All News
PLAY and DEFENCE for Improving Players

The Curse of Board 11
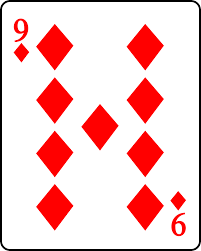
Keen bridge players and most Scottish people (surely all Scots play Bridge!) know that the diamond 9 is the “Curse of Scotland”. Our der knowledgeable friend “Google” will enlighten any ignorant players as to why very quickly.
However, it is less well known which card is the “Curse of Board 11”. For the answer, we need to take you to this board and give you the West hand. Do you want to come with me?
| Board 11 South Deals None Vul |
|
||||||||||||||||||||||
|
|
|
|||||||||||||||||||||
| West | North | East | South |
| you | dummy | ||
| Pass | |||
| Pass | 1 ♦ | Pass | 1 ♠ |
| Pass | 2 ♥ | Pass | 3 NT |
| All pass |
You lead your fourth highest club and see a couple of annoying club cards in dummy. Sure enough, the queen wins the first trick. Declarer leads the ![]() K at trick 2…and you can see no reason not to win that with your ace.
K at trick 2…and you can see no reason not to win that with your ace.
So to trick 3. Let’s see what happened. Without a huge amount of thought, you smell the chance of setting up a club trick and plonk the ![]() K on the table, smothering the jack. Any hopeful thoughts you might have of beating the contract (you were playing teams) were soon smothered as declarer soon took 4 spade tricks and 3 top diamonds to go with 2 club tricks…and you and your partner were left to fight over the scraps at the end.
K on the table, smothering the jack. Any hopeful thoughts you might have of beating the contract (you were playing teams) were soon smothered as declarer soon took 4 spade tricks and 3 top diamonds to go with 2 club tricks…and you and your partner were left to fight over the scraps at the end.

The ![]() 10. Why were you given that card? Why weren’t your clubs K632…K anything 62 except that cursed 10?
10. Why were you given that card? Why weren’t your clubs K632…K anything 62 except that cursed 10?
Then, you would have at least thought a little more closely about the whole hand. You wanted 4 more tricks to beat the contract, not just 1 more. From where were they to come? There was only one place and if you do not try, you will never succeed. What happened to the ![]() 8? Was it still in your hand?
8? Was it still in your hand?
| Board 11 South Deals None Vul |
|
||||||||||||||||||||||||||||||
|
|
|
|||||||||||||||||||||||||||||
|
|||||||||||||||||||||||||||||||
| West | North | East | South |
| you | dummy | ||
| Pass | |||
| Pass | 1 ♦ | Pass | 1 ♠ |
| Pass | 2 ♥ | Pass | 3 NT |
| All pass |
Normally what will happen when you try such a switch is that partner is most uncooperative and another over-trick is conceded. Just occasionally, the sun shines. Whichever way South wriggles here, there would be 5 heart tricks for the defence and another hopeful contract would have bit the dust.
That cursed ![]() 10.
10.
Of course, it is time to resurrect a very well-used saying about “a bad workman blaming his tools”. That ![]() 10 was put there to test and to tease you…and you took the bait!
10 was put there to test and to tease you…and you took the bait!
Had you remembered that South was a passed hand? They had already shown up with ![]() A and presumably from spade play the
A and presumably from spade play the ![]() Q. Presumably South has one of the red aces or else it does not matter what you play. If they hold the
Q. Presumably South has one of the red aces or else it does not matter what you play. If they hold the ![]() A, then switching to the heart will give declarer 9 tricks if the queen is played from dummy (5 spades, 2 clubs, 2 hearts) but if it is the
A, then switching to the heart will give declarer 9 tricks if the queen is played from dummy (5 spades, 2 clubs, 2 hearts) but if it is the ![]() A, then the heart switch is your only chance. If declarer has the
A, then the heart switch is your only chance. If declarer has the ![]() J, too bad. Maybe
J, too bad. Maybe ![]() 9 is good enough to block the suit? The
9 is good enough to block the suit? The ![]() 2 is certainly not.
2 is certainly not.
So, did you pass the test set by the cursed ![]() 10? The real curse was the lack of thought at trick 3.
10? The real curse was the lack of thought at trick 3.
If you were really inspired, you would have led the ![]() 8 at trick 1. Then after 5 rounds of that suit and a club switch from East, you could have taken 3 clubs and the
8 at trick 1. Then after 5 rounds of that suit and a club switch from East, you could have taken 3 clubs and the ![]() A as well..5 down! You do not have to be that brilliant. Just a little more thoughtful at all times when you are defending a hand. Blame not the
A as well..5 down! You do not have to be that brilliant. Just a little more thoughtful at all times when you are defending a hand. Blame not the ![]() 10.
10.
Richard Solomon
Go Back View All News Items
