All News
Daily Bridge in New Zealand
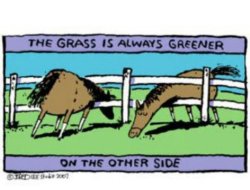
The Grass is Always Greener….at the other table!
“I wish” thought both declarers in a recent Teams match when they surveyed dummy “that I was in a different contract, in 4 of the other major suit.”
What was similar at both tables was that their partners had determined after vastly different auctions, which major suit game they should play.
What was different was that one declarer was playing 4 and the other 4
 ! Hence, we have the rather unusual statement below the following hands that you will not be playing the contract in the major of your choice!


| North Deals N-S Vul |
|
||||||||||||||
|
|
|
|
|||||||||||||
|
|||||||||||||||
Choose the trump suit with the two hands above and decide as South how you would play the contract you did not choose (that’s right, if you choose 4, you must play in 4…and vice versa!) on the lead of a diamond. The opposition have been silent in the bidding. You are only allowed to choose a contract where you have a 7- card fit. Therefore, 5 is barred.
At one table, North opened a Precision style 2 and South embarked on a relay style auction during which North got to bid hearts before South did. This had the unusual effect of making North the declarer in South’s longest suit, in 4.
Wishing...and a'hoping
With a void in the trump suit, you await dummy with both interest and trepidation. You look forward to a nice long row of trumps headed by the AKQ to help you on your way. So, the holey collection of hearts our declarer received did not fill North with great pleasure. They looked longingly at where they almost had a fit, in spades. “Looking” was not helping the cause. A diamond had been led. You had to look happy, despite inner feelings.
Actually, with our “computer Wizz” friend telling us that a small slam in hearts is cold, this declarer should have had no worries.
| North Deals N-S Vul |
|
||||||||||||||||||||||||||||||
|
|
|
|||||||||||||||||||||||||||||
|
|||||||||||||||||||||||||||||||
The opening diamond lead even put North in the right hand to start drawing trumps. Lay down the A and follow up with Q, not just because it was right on the night but because that it is the only way to play the suit for one loser (doubleton jack).
Eventually draw trumps and if you can finesse the right way in spades, and in clubs since you still need a discard for South’s fourth spade, you can emulate the machine and make two overtricks. Our declarer made just one overtrick but scored enough tricks to take away their initial worry. The “home grass” was pretty tasty, too!
More longing….
However, at the other table, a natural auction saw North have the final say:
North South
1 1
2 2
3 4
4 Pass
Metaphorically speaking, South had, after bidding 4, put down his pen and turned to West to say “Your lead”. It was indeed West’s lead but to 4 rather than 4.
It is interesting whether North has the right to change the final contract away from 4 even if they have a huge gap where their trump suit would be. Given that 2 had created a game-forcing auction, South might have only bid 3 had there been any doubt about where they wished to play, possibly keeping 3NT in the mix. Of course, 3 might also be a stronger hand looking for a possible slam. Given those two options, then the jump to game probably should be a demand to pass, rather than giving North an opinion in the matter.
Thus, South received the  K lead and “looked longingly” at where they would like to be, in 4! “Looking was not helping the cause.” Such a moysian (4-3) fit is not that easy to make, with neither 7-card side suit being solid. In fact, the way to make 10 tricks is to kind of ignore both long side suits and make your contract via a cross-ruff. Seven trumps and three side-suit aces come to a good number.
So, win the A and importantly, cash A and ruff a heart. The next play is critical. It should be easy enough to ruff a couple of diamonds in the South hand but declarer needs three ruffs. You must take the club ruff first.
So, A and ruff a club and ruff a second heart. Ruff a diamond and ruff another heart with A. At that point, you have taken the first 8 tricks (three aces and 5 ruffs). Ruff another diamond and you still have the K in hand for trick number 10.
No more longing….maybe the loss of an imp or two as not even a computer program can make overtricks.
Alas, at the table, declarer ruffed a diamond back to the South hand at the first opportunity. Then, when the third heart was played, West discarded a club….and the contract could no longer be made. When declarer did try and ruff a club to hand, West over-ruffed and unkindly played a round of trumps which left South without resource.
So, no more longing. You have to make do with what you have got…and the contract may not be as bad as you think!
Defence!
It’s time to be defending.
| West Deals Both Vul |
|
||||||||||||||||||||||
|
|
|
|
|||||||||||||||||||||
| West | North | East | South |
| dummy | you | ||
| Pass | 1 ♦ | Pass | 1 ♠ |
| Pass | 3 ♦ | Pass | 3 NT |
| All pass |
You are playing Teams. Simple bidding and a standard J lead. Declarer plays 2 from dummy…. and you? Plan the defence.
Richard Solomon
Go Back View All News Items
